


How to make safe LARP arrows
How to make a safe LARP arrow. Step-by-step, material list (heads, shafts, nocks, and fletching) and tips for beginners and advanced players.

What do you find in the article?
Welcome to our guide on making LARP arrows! Whether you're a newbie or a seasoned player, a quick refresher never hurts. Today, we'll look at how to craft a safe and functional LARP arrow, from the head and shaft to the fletching. Let's get to it!
You can get all the materials you need for arrow making here.
Making a LARP arrow requires precision and the right choice of materials. Heads can be handmade or store-bought, with pre-made ones guaranteeing higher safety. Wooden shafts are light and cheap but less durable, while fiberglass ones last longer but can splinter.
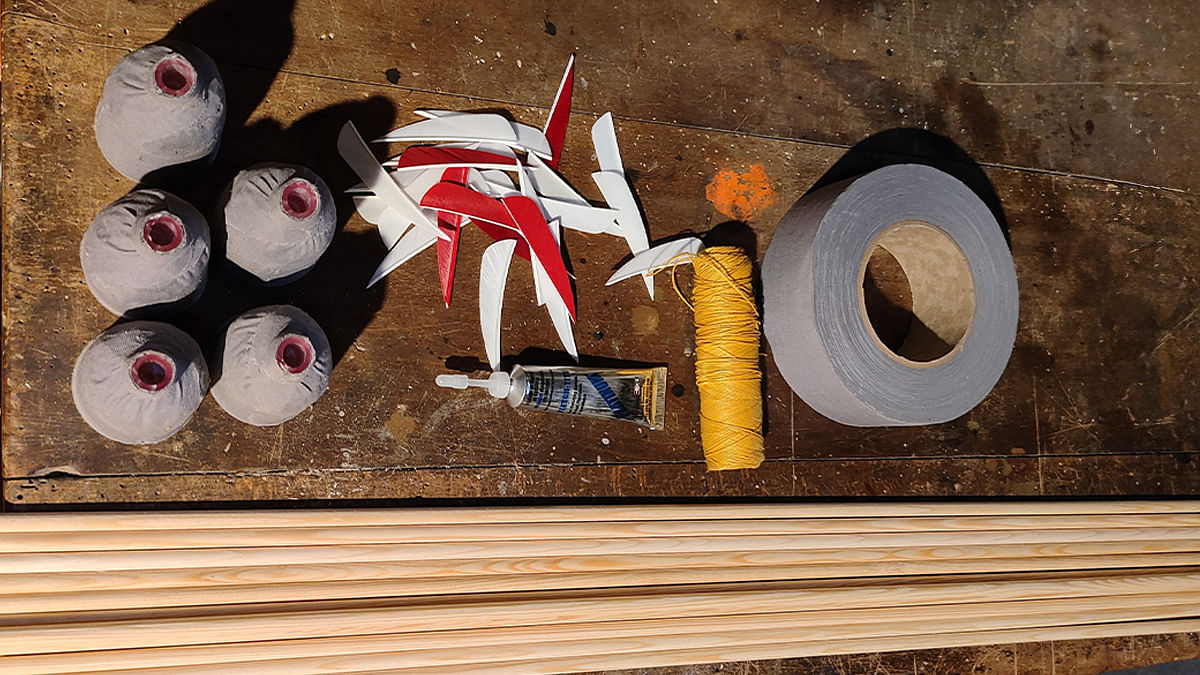
Nocks can be glued on or integrated into the wooden shaft, which requires precise drilling and cutting. Fletching, whether made of feathers or duct tape, ensures arrow stability. You can attach the head using duct tape or a hot glue gun. Don't forget to mark your arrow for easy identification.
Arrow head
Handmade - These heads are made from various materials, most commonly plastic bottle caps or corks, foam, pipe insulation, and duct tape. This option might seem very cheap, but don't be fooled. In reality, this type of head doesn't offer that much savings, and you must consider other aspects, the most important being safety. By making the head yourself, you are responsible for its safety. Also, consider the time required to make such a head.
Store-bought - These heads are mass-produced using verified procedures to ensure all safety measures are met. These heads come at a price, but you get a guarantee of time savings and safety. All that's left for you to do is properly attach the head to the shaft and enjoy shooting.
Deluxe - This type of head is used primarily in the Western scene. These are molded heads. The advantage of these heads is their shape, which makes them fly better, but the price is often disproportionate to their use on the Czech scene.
Shaft
Wooden - Wooden shafts are cheaper and lighter compared to other materials. The main disadvantage is their short lifespan. However, you can extend it by choosing the right wood and proper grain orientation. The optimal wood for shafts is beech, oak, or ash. These woods are tough and flexible, so they don't break as easily. Proper grain orientation is also very important. The grain must always run parallel to the axis of the arrow.
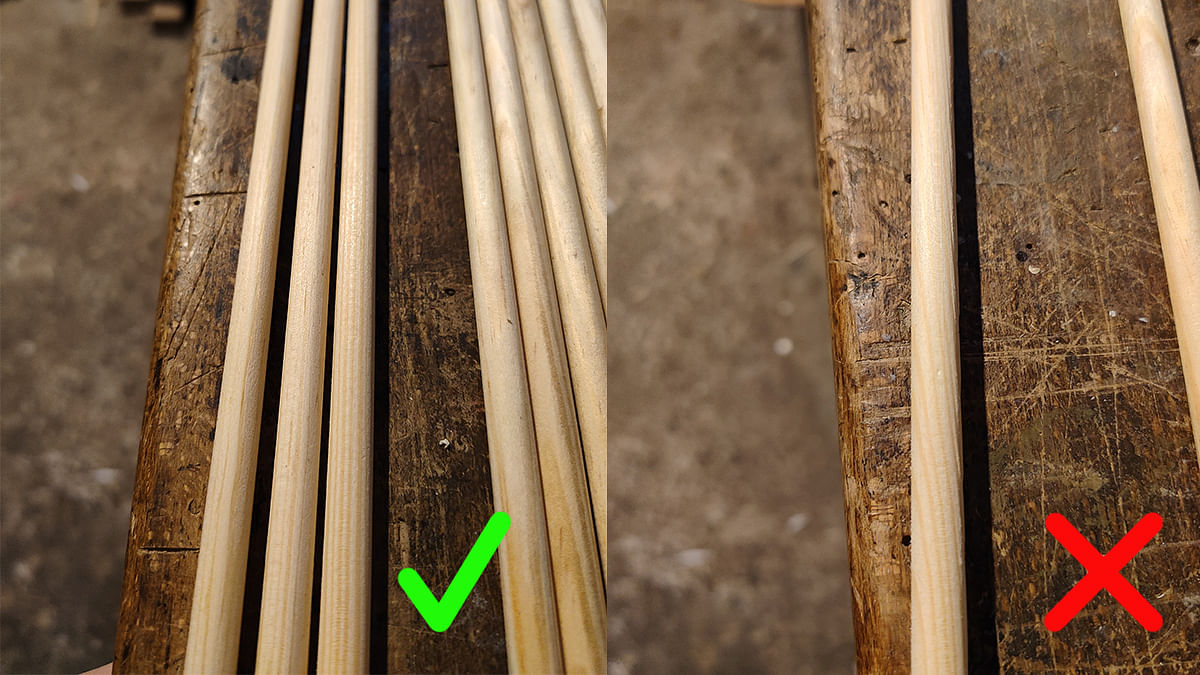
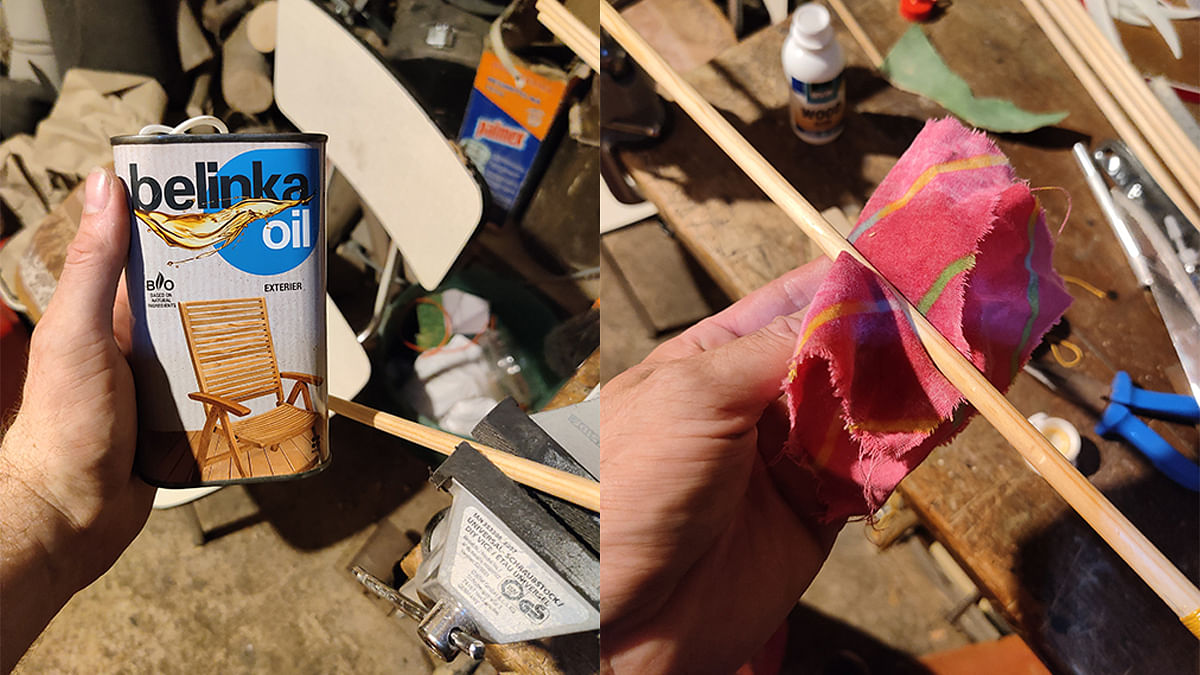
Shafts with grain running at an angle to the arrow's axis are dangerous because if they snap, they create a sharp splinter that can seriously injure someone during a shot. Such shafts must be discarded. Take the shaft and measure it. If the length meets your shooting needs, you're good to go. Otherwise, cut it to the required length. After finishing all production steps, it's a good idea to treat these shafts with natural oil so they don't absorb as much moisture.
Fiberglass - Fiberglass shafts are unbeatable in terms of durability, but this is balanced by their high weight and tendency to splinter. The older a fiberglass shaft is and the more hits it has taken, the more it tends to release fibers and fray. These fibers can be very unpleasant when they stick into the hand holding the bow upon release. You can prevent this with a thick layer of varnish or by wrapping the shaft in tape. Take the shaft and measure it. If the length meets your shooting needs, you're good to go. Otherwise, cut it to the required length.
Glue-on nock - Glue-on nocks are advantageous because they can be used for both fiberglass and wooden shafts and come with several types of mounting holes. The most common are cylindrical holes or conical recesses. For both types, you need to sand the rear end of the shaft so it fits properly into the hole in the nock. Then, just apply glue to the shaft or into the hole in the nock, join both parts, and align them so they are coaxial. Finally, let the glue harden.
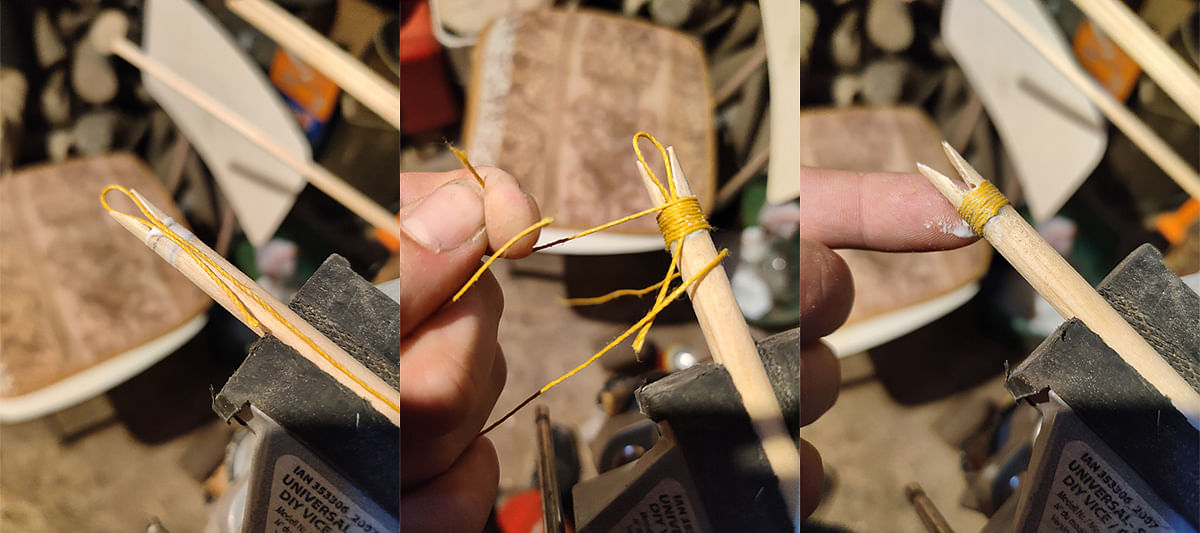
Nock integrated into a wooden shaft - This type of nock is not suitable for fiberglass shafts. Start by marking a line 10 to 12 mm from the end of the shaft. Drill a 3 mm diameter hole here, perpendicular to the shaft axis.
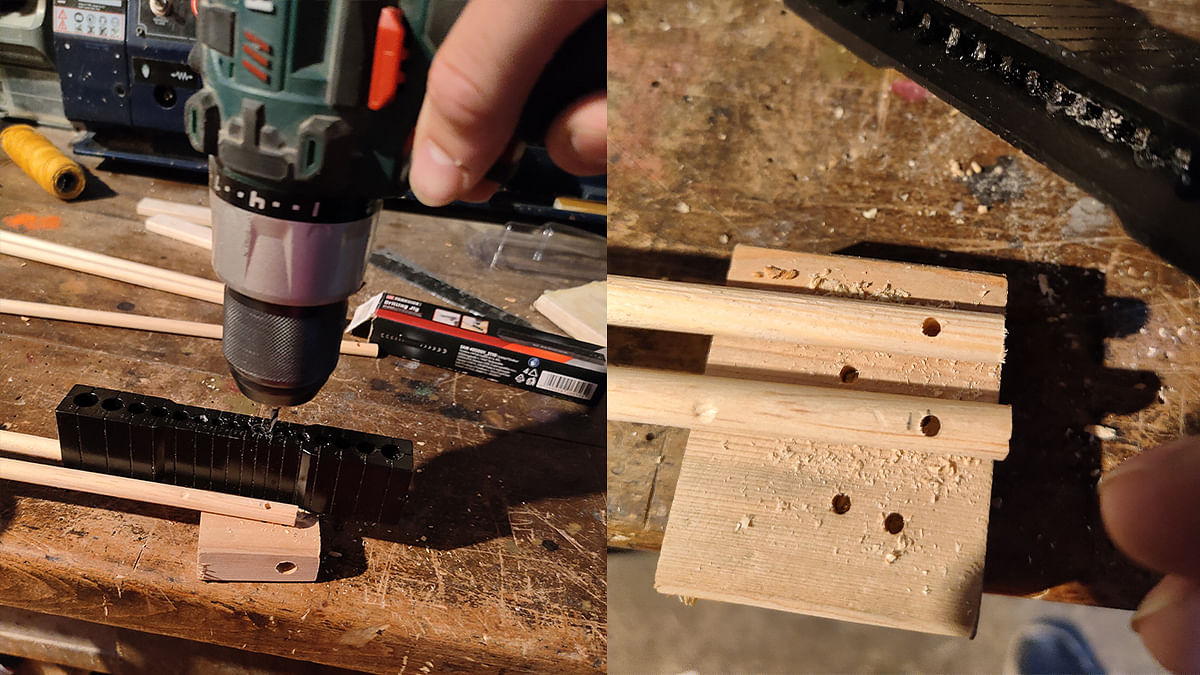
Next, clamp the shaft into a vise with soft jaws using a rubber, leather, or cloth insert and cut a "V" shaped groove from the end of the shaft to the drilled hole, parallel to the axis of the drilled hole.
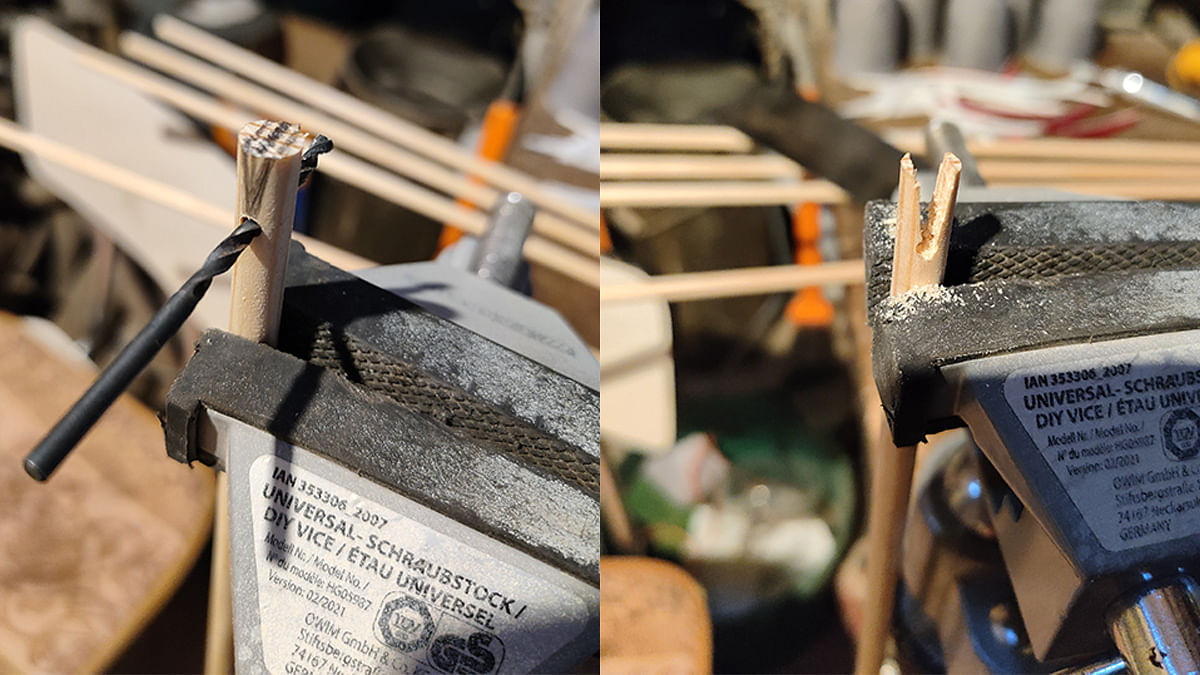
It is ideal to then take a 10° angle file and smooth the surface of the groove as needed (you can also use sandpaper).
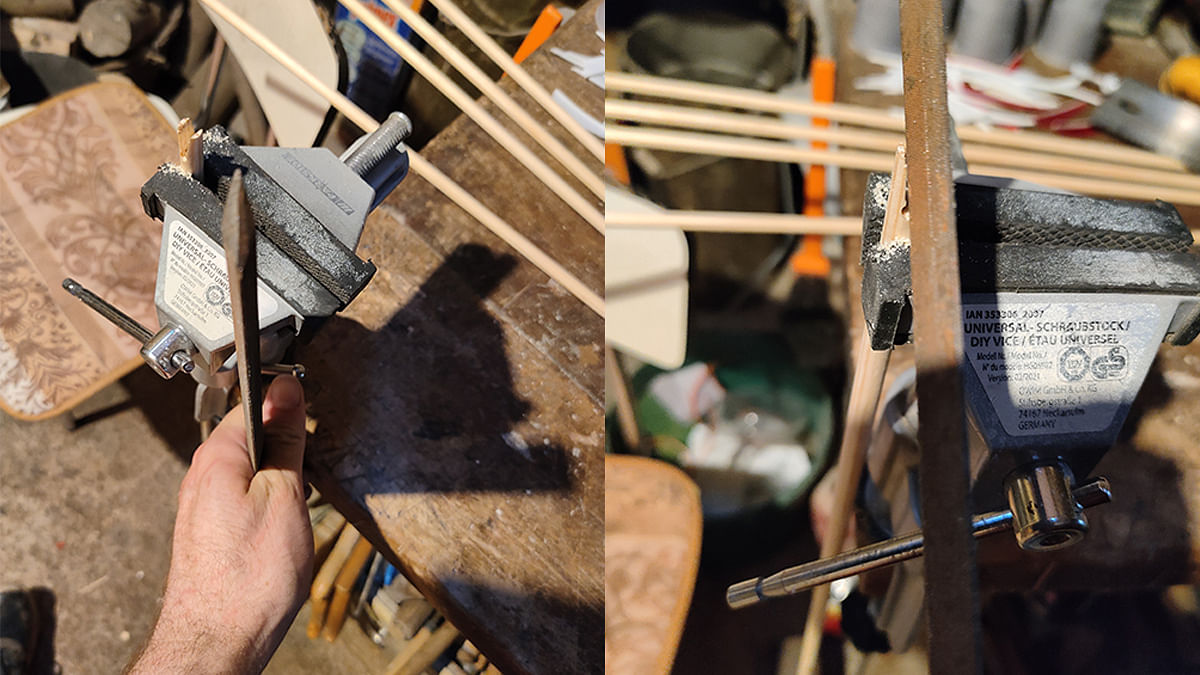
Then round off the end of the nock.
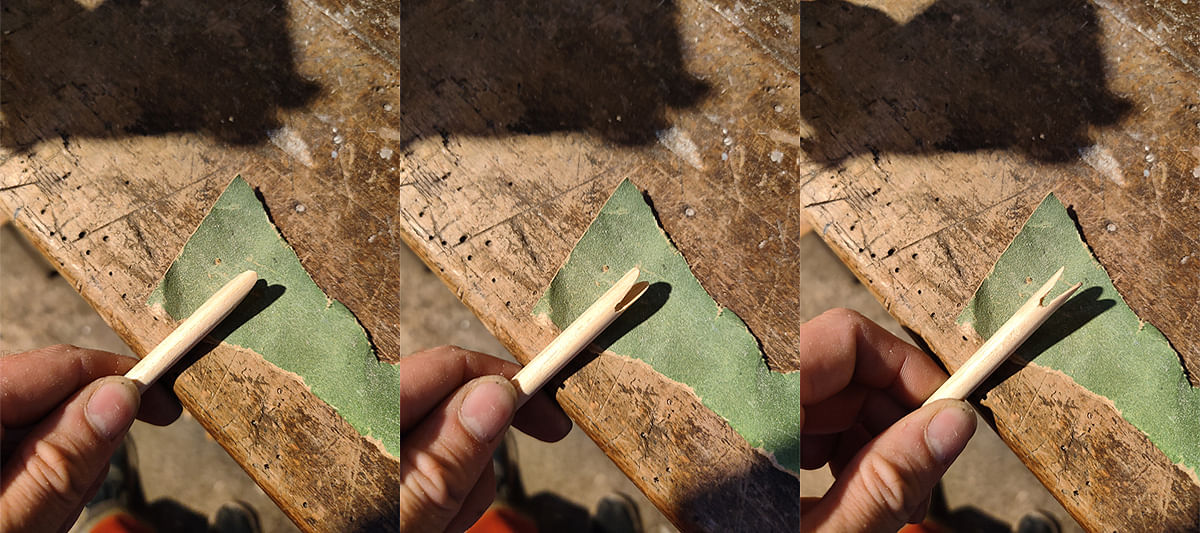
Finally, you need to reinforce the nock bed. Do this by taking dispersion glue and applying it to the area from the nock bed to a distance of about 5 mm away from the nock.
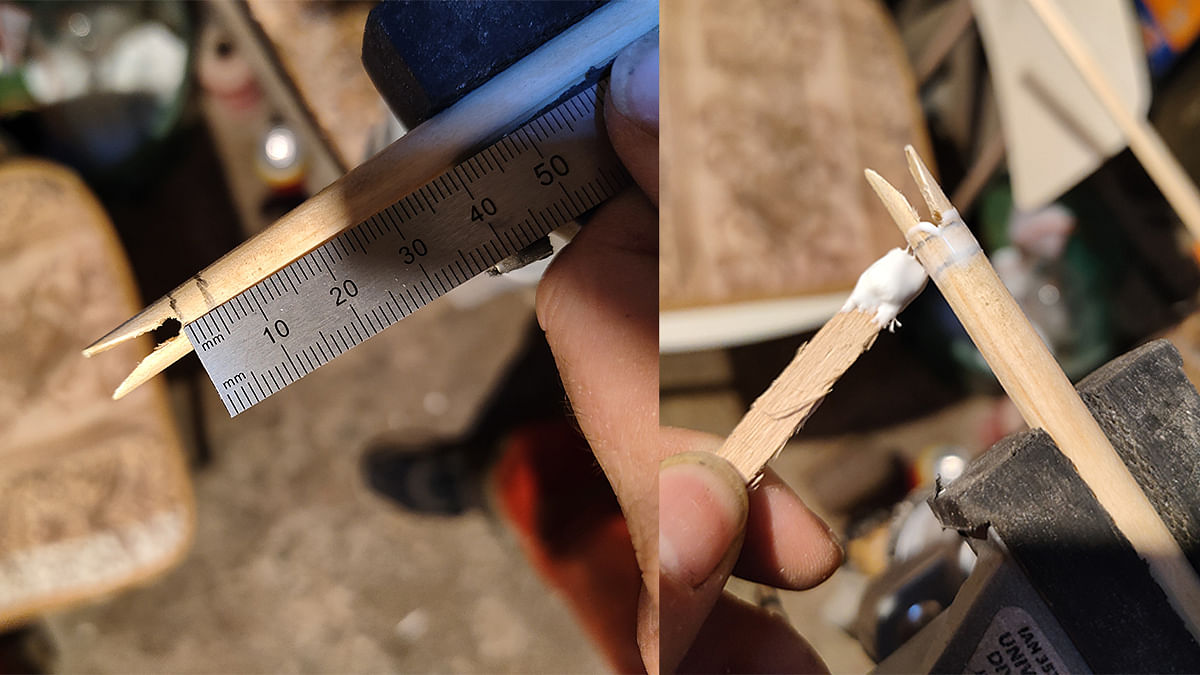
Then wrap the entire area with the glue using linen thread. Coat the wound thread with more glue and let it dry.
Fletching
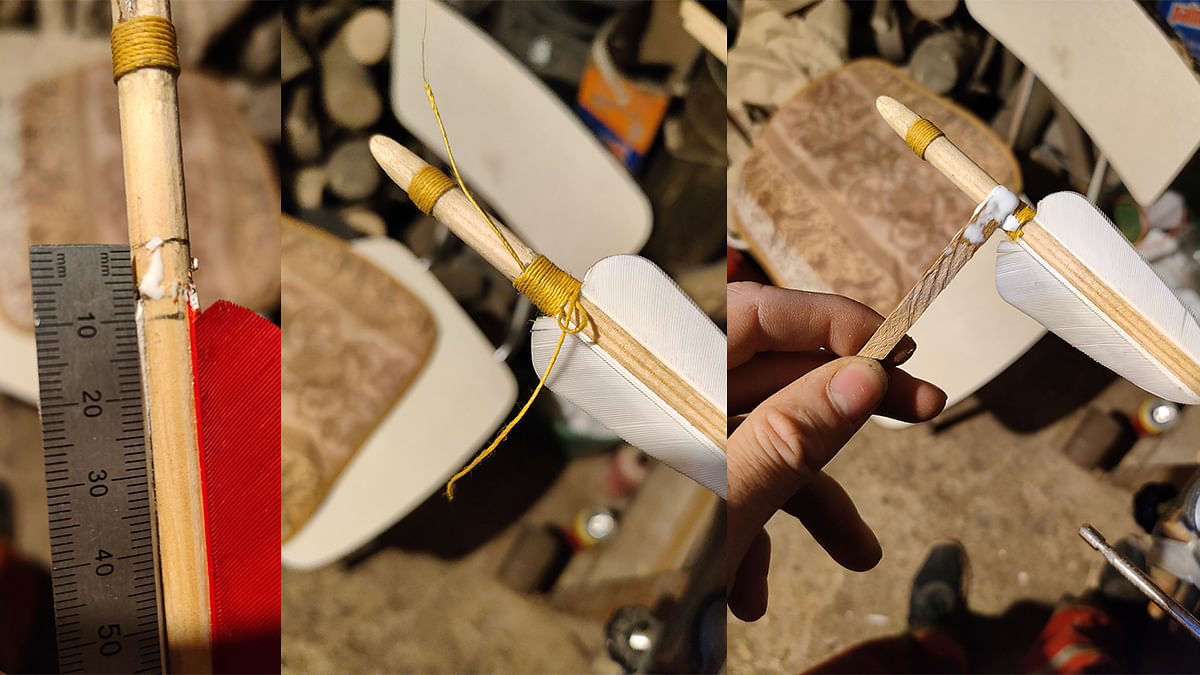
Glued feather fletching - Fletching is most often available in two colors: red and white. Two of the same color and one of a different color are placed on the arrow with 120° spacing. Usually, one red and two white feathers are used. First, measure the positions of the individual feathers. Start with a ring at an optimal distance from the nock wrapping (the optimum distance is individual, usually between 10 and 40 mm). Then, draw a line parallel to the shaft axis perpendicular to the nock notch.
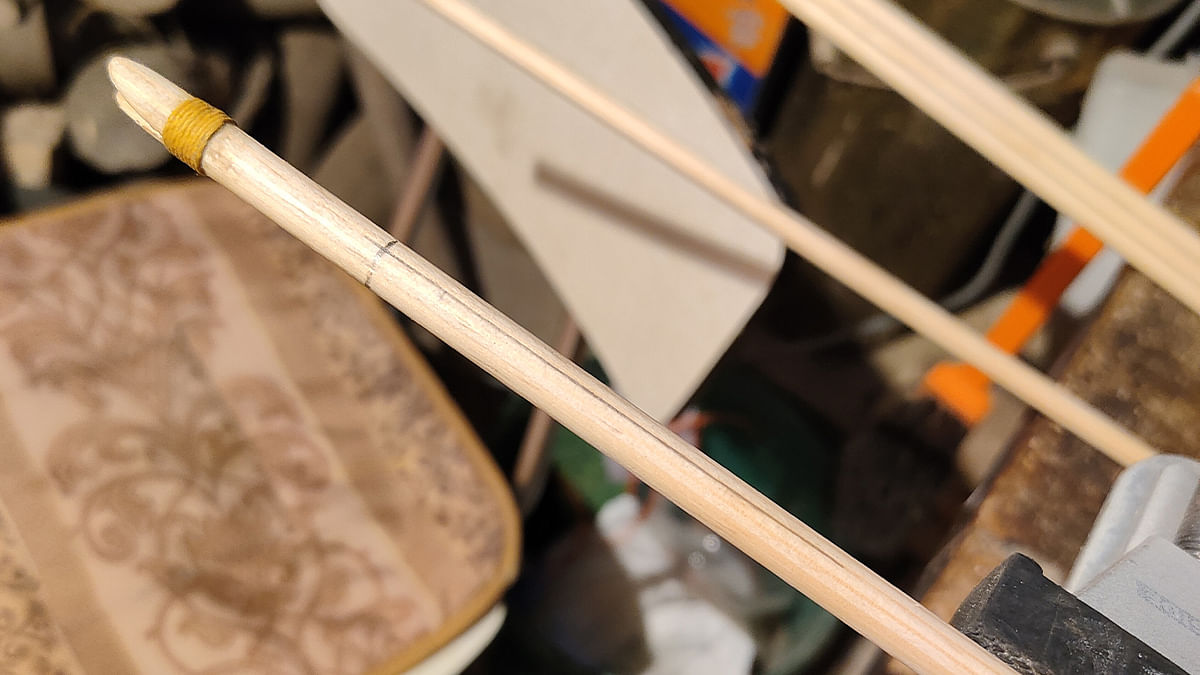
Take the red feather, apply glue to the bottom of the feather, and place the feather on the shaft along the drawn line.
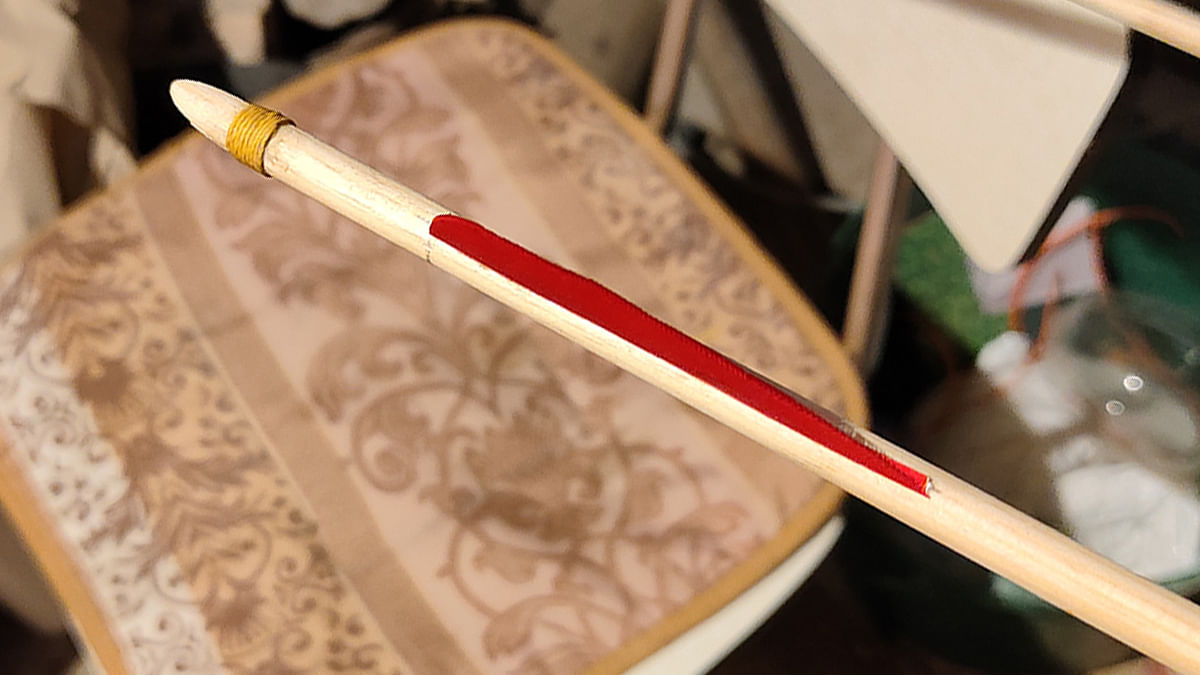
Make sure the feather follows the line and the rear end of the feather lies on the ring.
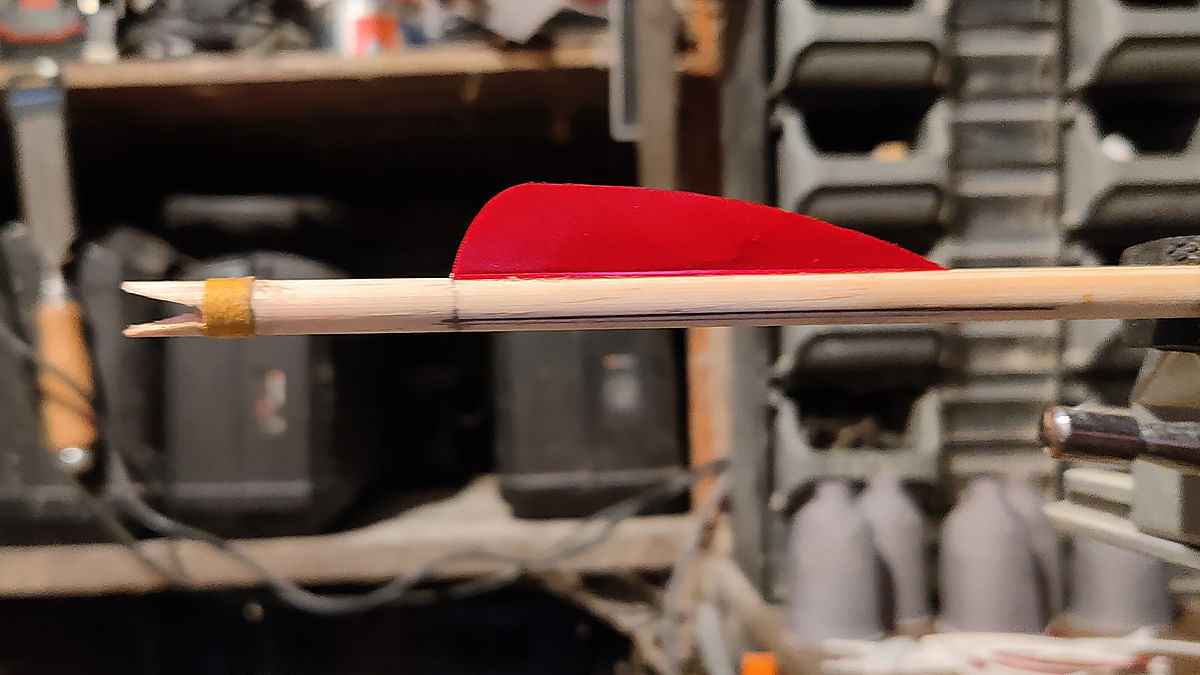
Hold the feather in place until the glue dries. Rotate the shaft 120° along its axis and repeat the process, but this time glue a white feather.
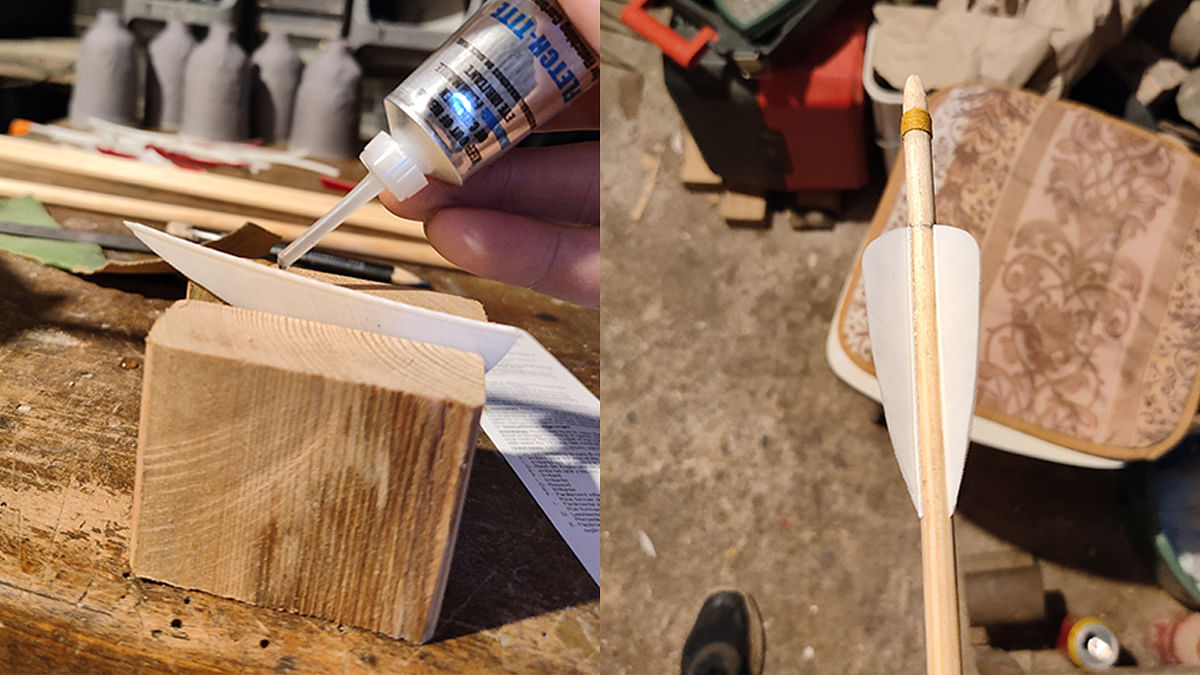
Finally, rotate the shaft the last 120° and repeat the process with the white feather. Now, if you place the string into the notch and look along the arrow, the white feathers should form a 30° angle with the string, and the red feather should be perpendicular to the string.
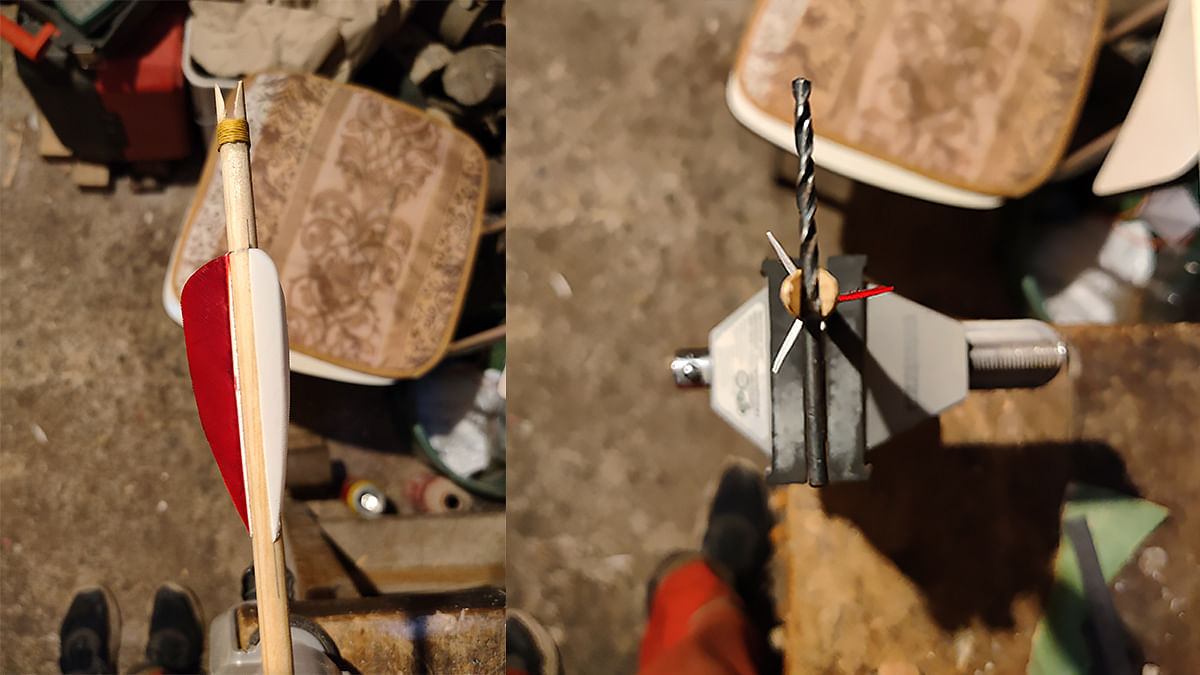
Now you need to apply a drop of glue to the front and back ends of the feather to create a smoother transition from the shaft to the feather.
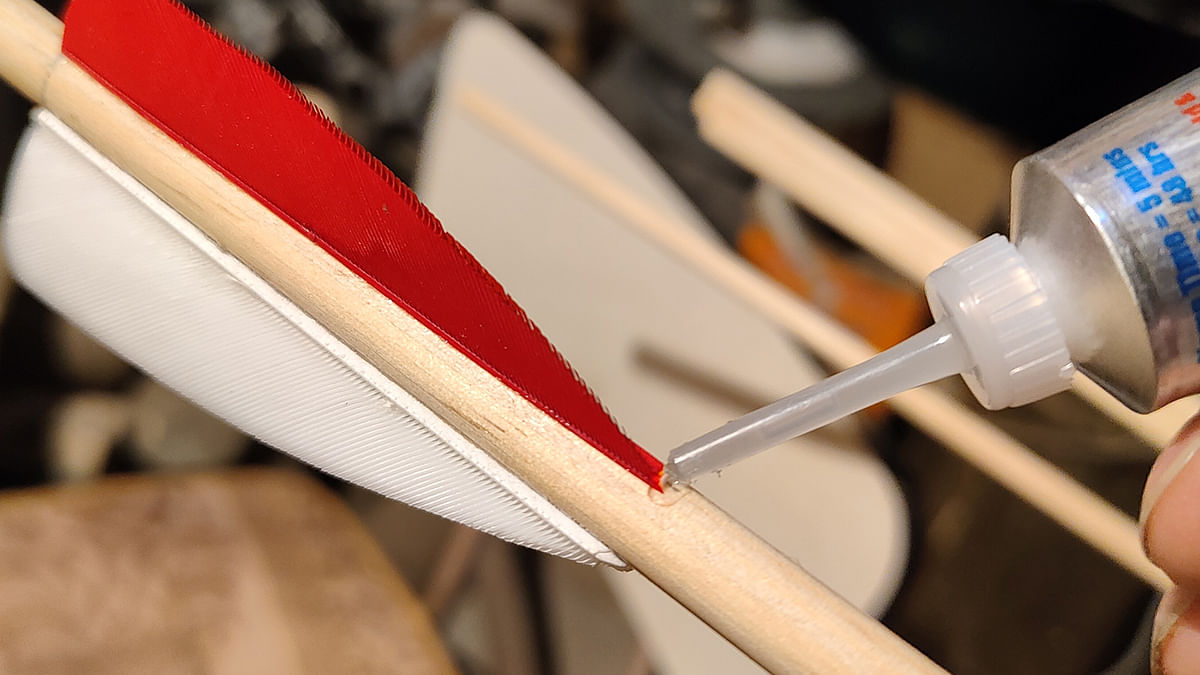
You can leave the feathers in this state, but there is a risk that they might tear off during battle due to friction against the bow body, despite the quality of the glue. A prevention against this is to wrap the front and back of the feathers with linen thread. Start the wrapping about 10 mm before the start of the feather and extend it about 5 mm over the start of the feather.
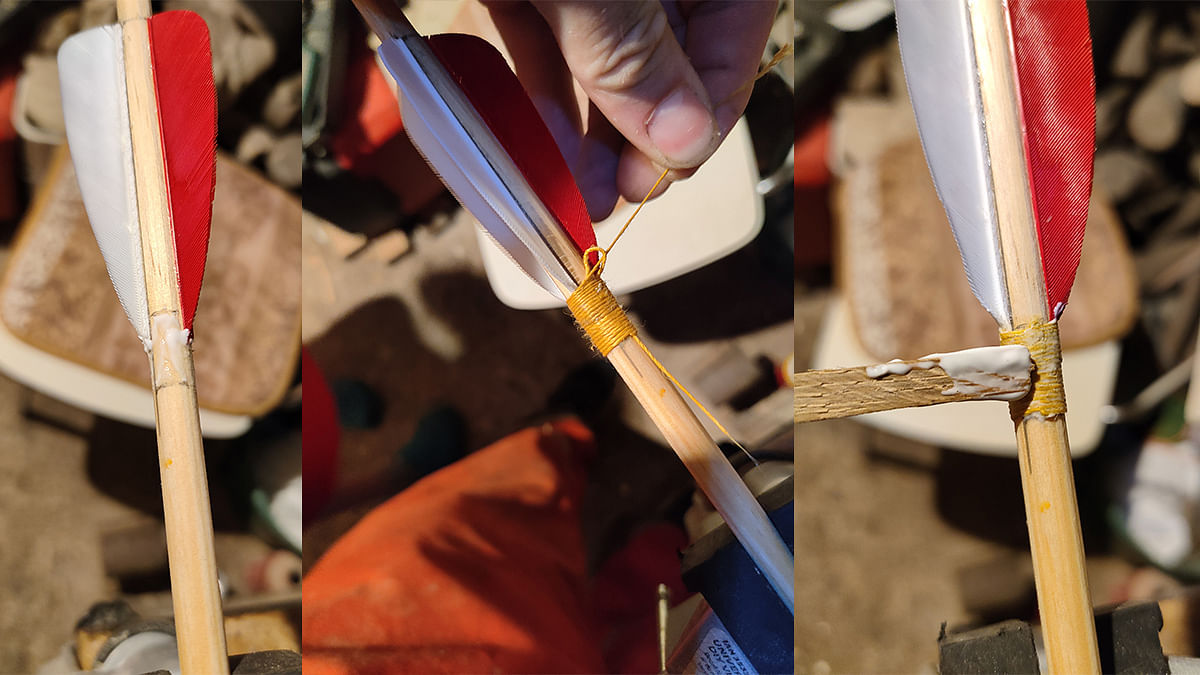
On the back of the feather, just start 7 mm behind the feather and extend the wrapping 3 mm over the end of the feather. Apply dispersion glue under and over the wrapping to fix it in place.
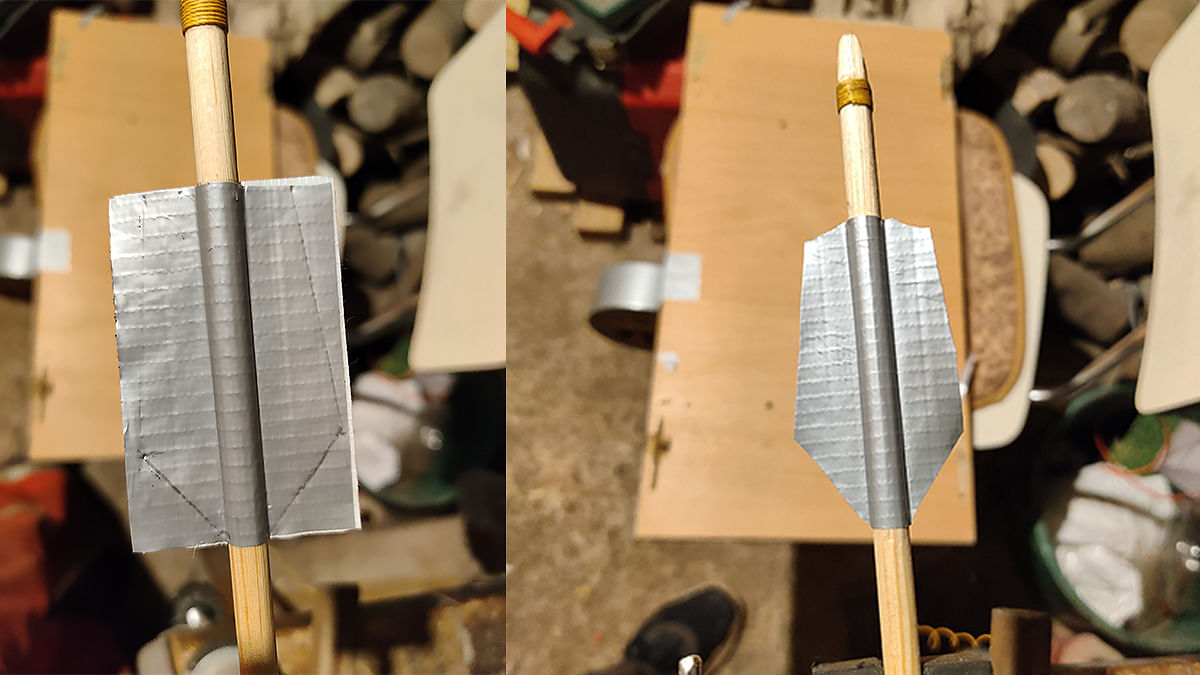
Duct tape fletching - These feathers are not as precise, but they serve their purpose. First, measure the positions of the individual feathers. Start with a ring at an optimal distance from the nock wrapping (the optimum distance is individual, usually between 10 and 40 mm). Cut two approximately 70 mm long strips from 50 mm wide tape. Place one strip on the table with the sticky side up and place the shaft on it so that the string passes through the nock notch parallel to the table and the shaft runs through the center of the strip along the longer side.
The rear end of the strip (feather) should start at the measured ring near the nock. Then place the second strip with the sticky side onto the first strip so they overlap. Now press both strips together and smooth them out. Then draw the shape of the feather on the strips and cut it out. This method can be used for both two-feather and three-feather setups.
Head assembly
Duct tape - This connection is optimal for cases where future replacement or removal of the head is expected. For storage, for example, it is optimal to detach the heads from the arrows and store them separately. Put the head on the shaft and tape its end to the shaft with a strip of duct tape. It must never happen that the head is not attached to the shaft! You are endangering the safety of others.
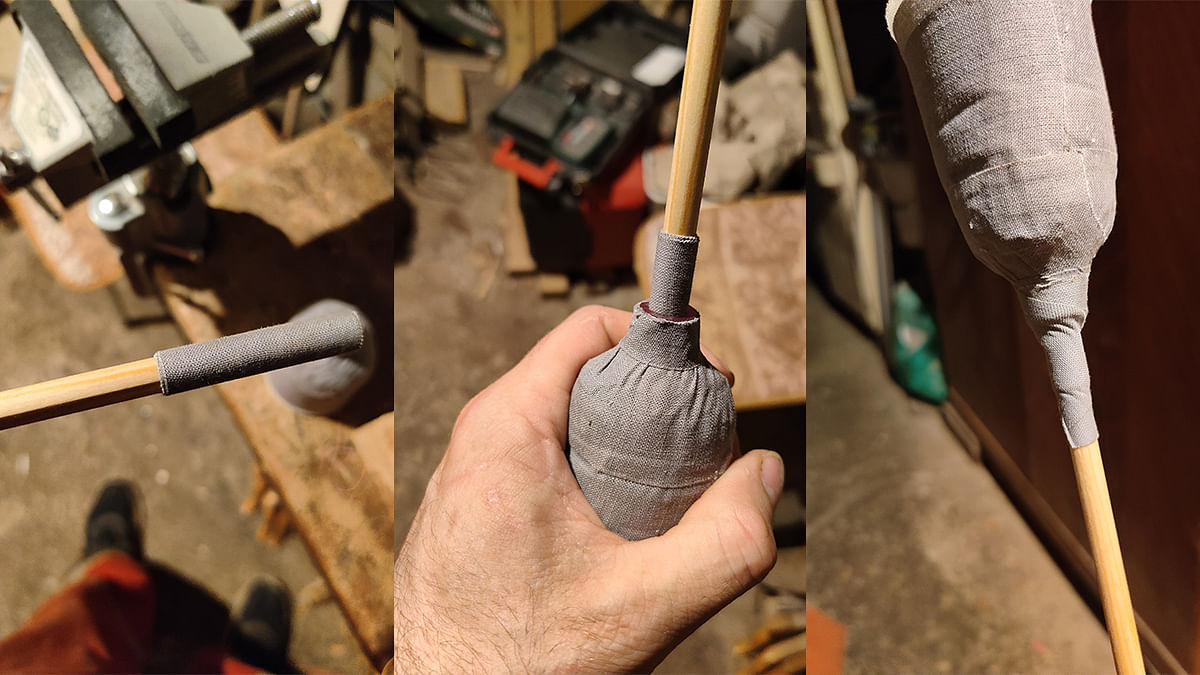
Hot glue gun - Easy application, but at that point, the head cannot be replaced. This method is suitable for fiberglass shafts where there is no expected need to change shafts. Apply glue to the shaft or into the hole in the head with a hot glue gun and push the head onto the shaft.
Finishing
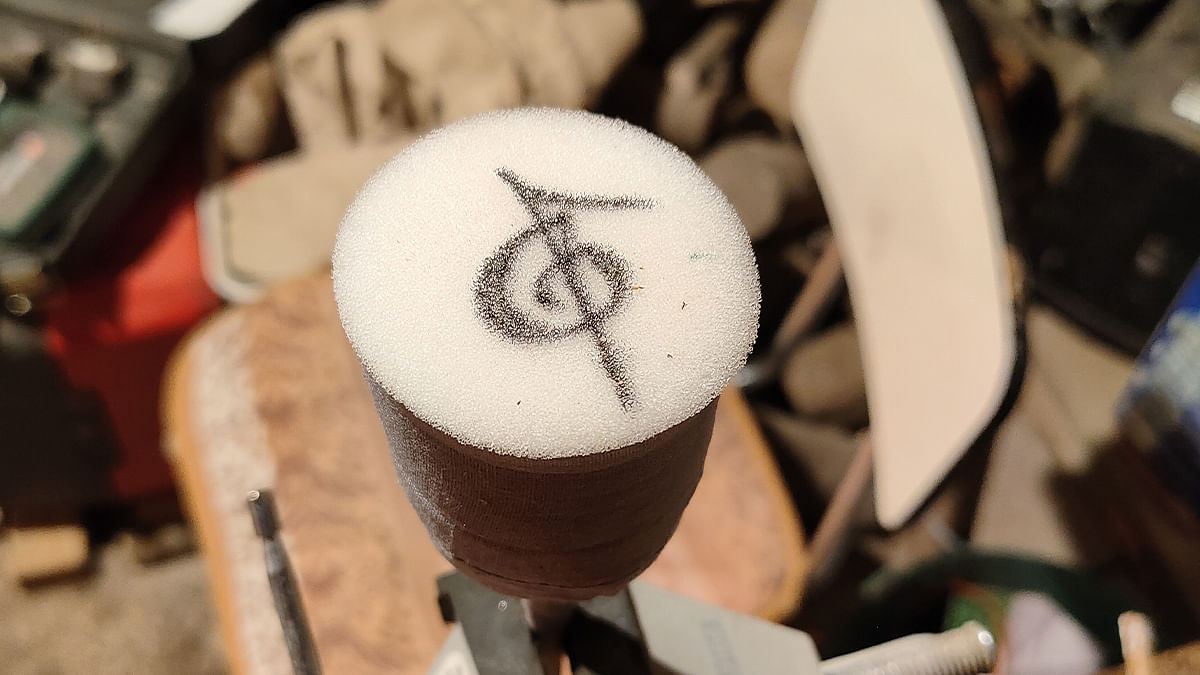
Marking the arrow - Marking the head is very important so that you and your opponents and fellow fighters can easily recognize your arrows and collect them more easily after the battle. Another type of marking is color-coding the shaft, for example with spray paint, colored tape, or colored wrapping.
I hope this guide helped you understand the basics of making LARP arrows. Remember that safety always comes first, so choose your materials and procedures carefully. Whether you decide on handmade or store-bought components, proper assembly and maintenance of your arrows will ensure not only effective shooting but also a long lifespan for your equipment. So now, just head out on your next adventure with your new knowledge! Your adventure begins.
author Gavner Zruč

Gavner Zruč
A former LARP and cosplay gear maker for himself and others. His 15-year career has taken him from home production to custom manufacturing for a wide range of clients, and back to the peace and quiet of his home workshop.


You might also like

Entering the World of LARP: A Beginner's Guide
Want to try LARP? Find out how to choose your first event, where to get a costume and weapon, and why you shouldn't be afraid of the great Czech community. Start your adventure! full article...
7. 8. 2026 Jaroslav Deusn Noga 5 min
Heroes V - high fantasy LARP where dreams come true
Discover the world of Heroes V - The Thirteenth Eclipse! An epic LARP full of magic, battles, and roleplaying that will pull you into an adventure you won't find anywhere else. full article...
Non-fiction journalism 12. 5. 2026 Ivo „Bonhart“ Nepeřil 3 min
Ovčina 2025 – A LARP for kids and adults
The family larp Ovčina brings children and adults together in an adventure inspired by Middle-earth. Safe gameplay, stories, and fun for all ages. full article...
Non-fiction journalism 27. 4. 2026 Jiří Reiter 4 min